Summer is officially in full swing, but I’m not sure if I should laugh or cry. All I know is that I’m constantly walking the fine line between wanting to make magical childhood memories and just trying to survive until bedtime.
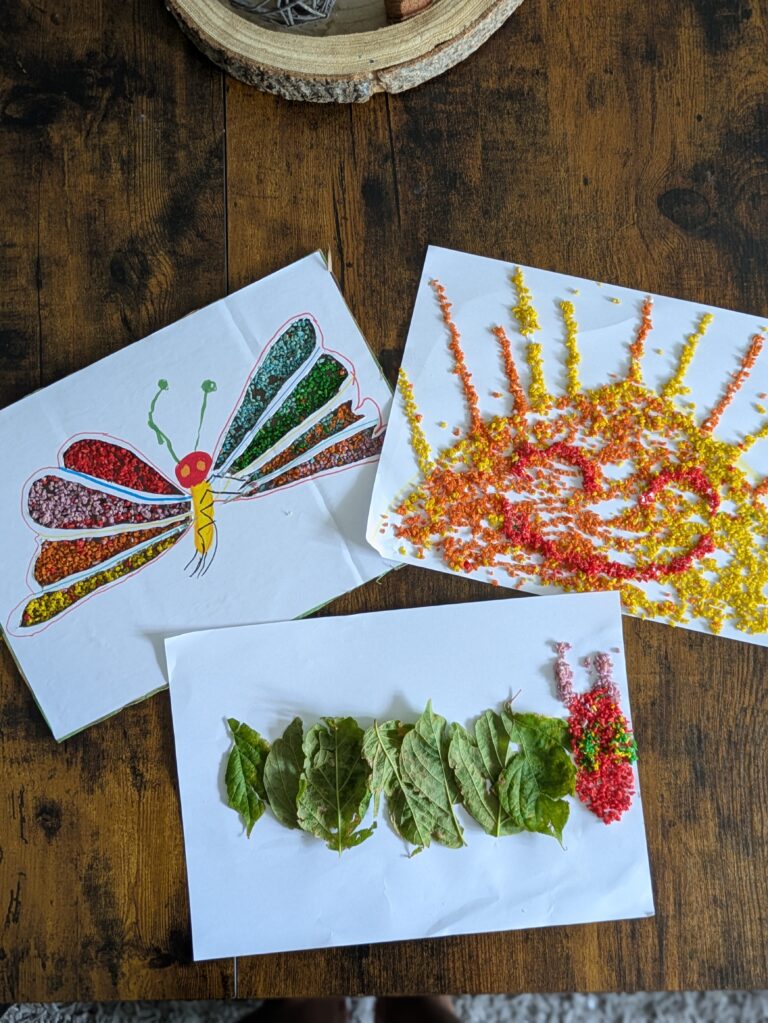
As a mom of three kids, I know exactly how the typical summer craft session goes: you spend twenty minutes setting up a butterfly project, then your preschoolers add glue to the wings for barely 30 seconds, and say, “I’m done!” and leave you with all the mess to clean up, so annoying.
But I’ve realised that such projects are usually flat and boring to them, or maybe even too controlled, so I decided to create mixed-media sensory crafts instead. This way, crafting sessions are more open-ended and give them the freedom to create their own way. And, by combining different textures, weights, and 3D objects, these activities naturally stimulate their sensory system and, of course, keep their hands booked busy for way longer than a standard colouring page. In addition, they double as fantastic finemotor workouts that strengthen the exact muscles they need for pencil gripping and writing.
Okay, I think I’ve done enough talking for now, so here are three tested, 3craftmama-approved summer crafts my three kiddos and I made together that will actually keep your own preschooler’s attention!

Disclosure: This post may contain affiliate links. As an Amazon Associate, I earn from qualifying purchases. This means that if you click on a link and make a purchase, I may earn a small commission at no additional cost to you.
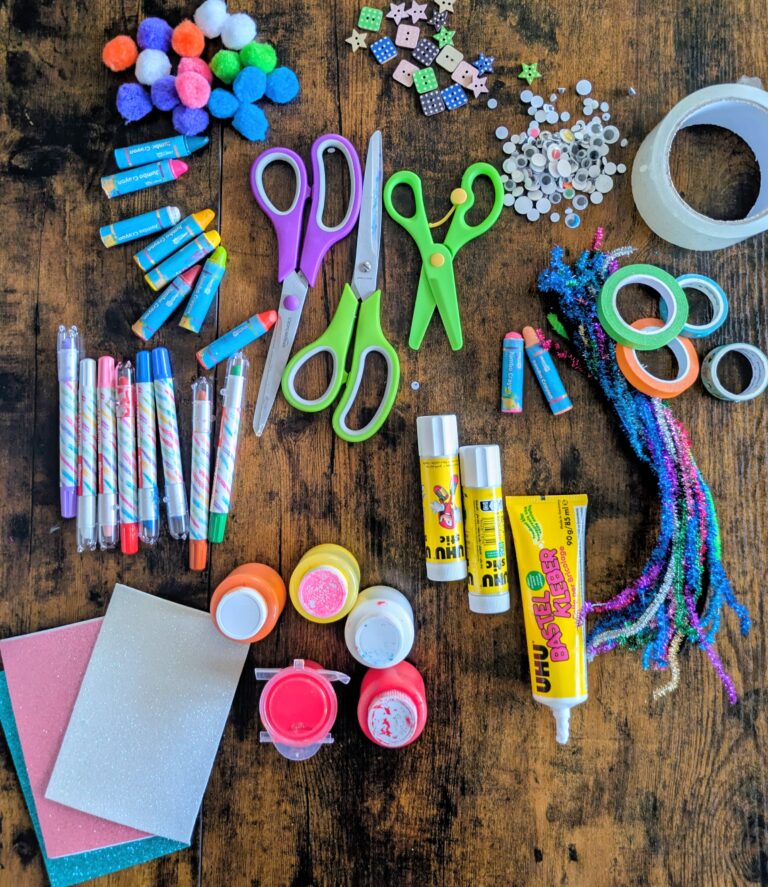
The Sensory Supply List
One more thing before we dive in properly, we made these using a mix of kitchen scraps and leftovers from our craft closet, so to maximise the sensory benefits, I suggest you try to gather your materials that offer contrasting textures.
| Material Type | What We Used | Sensory & Fine Motor Benefit |
| Smooth & Rigid Paper straws | faux flower heads | grasping cylinders, tactile variation |
| Soft & Fuzzy | Pom-poms, yarn/pipe cleaner scraps | Soft vs. hard contrast |
| Textured & Heavy | Dried bow-tie and rotini pasta. | Deep tactile pressure, pincer grasp development |
| Crisp & Light | Tissue paper squares | cardstock Visual |
Shop the supply list here
- faux flower heads
- Pompoms
- Yarn
- Pipe cleaners
- Dried bow-tie and rotini pasta
- Tissue paper squares
- Tempera paint
- Vinegar
- Food colouring
- Straws
Step 1: The “Pop-Out” 3D Craft Templates
Before we even touched the paint and glue, I wanted to give my kids a sturdy canvas that would make their craft literally pop, so I used white cardboard paper that I got in my local one-euro store, a thick black marker, and, of course, a pair of scissors.
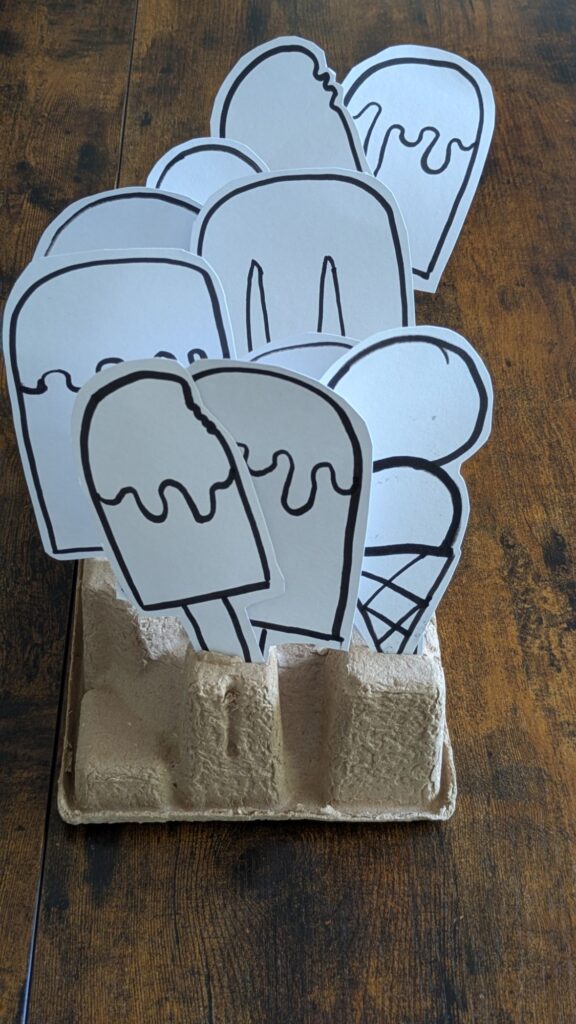
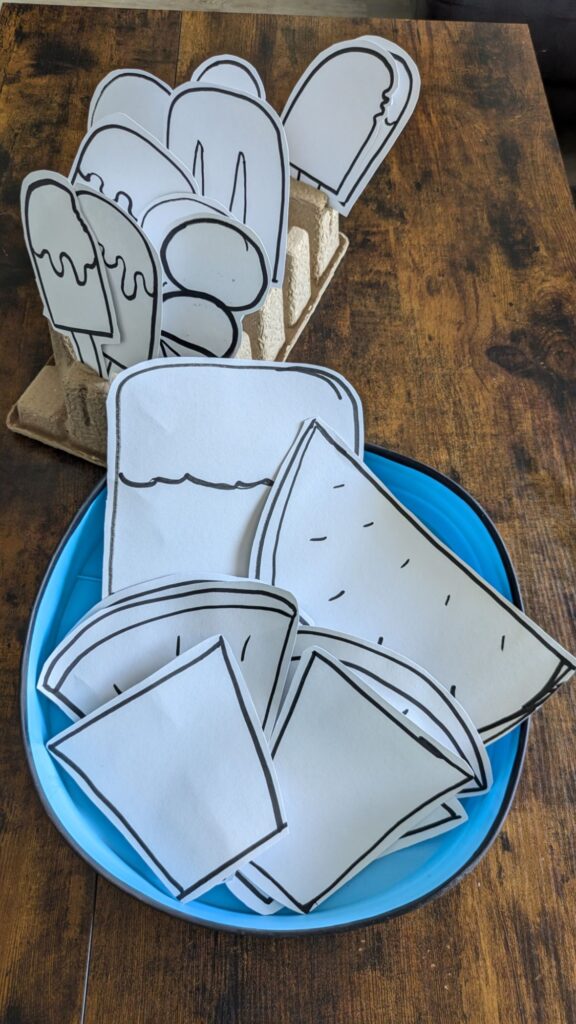
As you can see in the image, I hand-drew the outlines of popsicles, ice cream cones, lemonade glasses, and watermelon slices using bold, heavy black lines. A little tip, though: Don’t skip the thick black outlines, because for preschoolers, having a distinct, heavy border helps them visually map out the shape, which makes it much easier for them to focus their painting and glueing inside the lines. So once I cut out these sturdy cardboard templates, they were perfectly ready for my kids to dive into the paint, layered raw materials, and 3D mixed media.
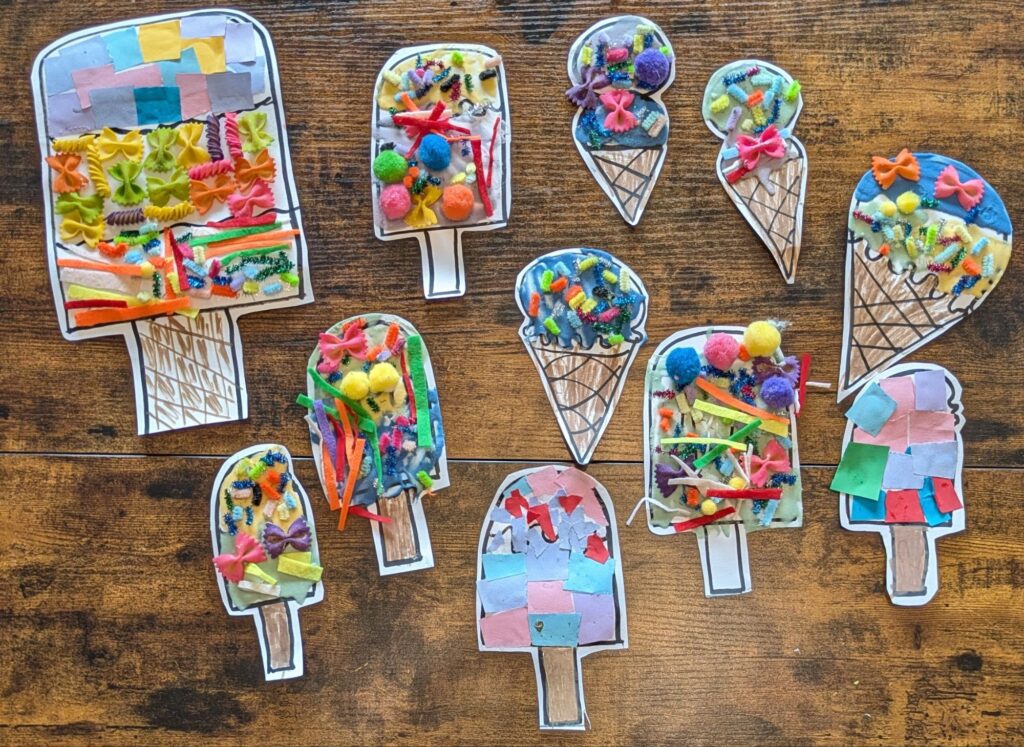
1. The Textured Ice Cream & Popsicle Bar
Our first project turned out amazing. At this point, my kids will be 90% ice cream by the time July rolls around. For this activity, I set up a “topping buffet” on paper plates and let them build their own frozen treats.
Developmental Focus: The Pincer Grasp & Heavy Work
Because we used heavy elements like pasta and fluffy pom-poms, my kids had to use a deliberate pincer grasp (thumb and index finger) to pluck the items out of the sorting trays and press them into the glue.
How to Make It: Draw the ice-cream cones and popsicle outlines on heavy cardstock and cut them out (If you don’t have white cardstock, no worries, you can use recycled cardboards or cereal boxes. No need for a store trip). For the “frosting”, we made puffy paint with flour, salt, baking powder, and food colouring. With their popsicle craft sticks, my kids spread puffy paint on the ice-cream and popsicle outlines and pressed the “toppings” into the “frosting. All that spreading and pressing is amazing resistance work for tiny hand muscles!
FYI: Standard printer paper will completely sag and tear under the weight of wet glue and heavy dry pasta, so definitely use thick cardstock or cardboard for the backing so their craft doesn’t fall apart while drying!
If you want more low-prep ideas for the summer, click here to download my complete 30-Day Low-Prep Checklist to print and hang on your fridge for free! All the low-prep ideas are listed, along with a detailed list of the supplies needed for the activities.
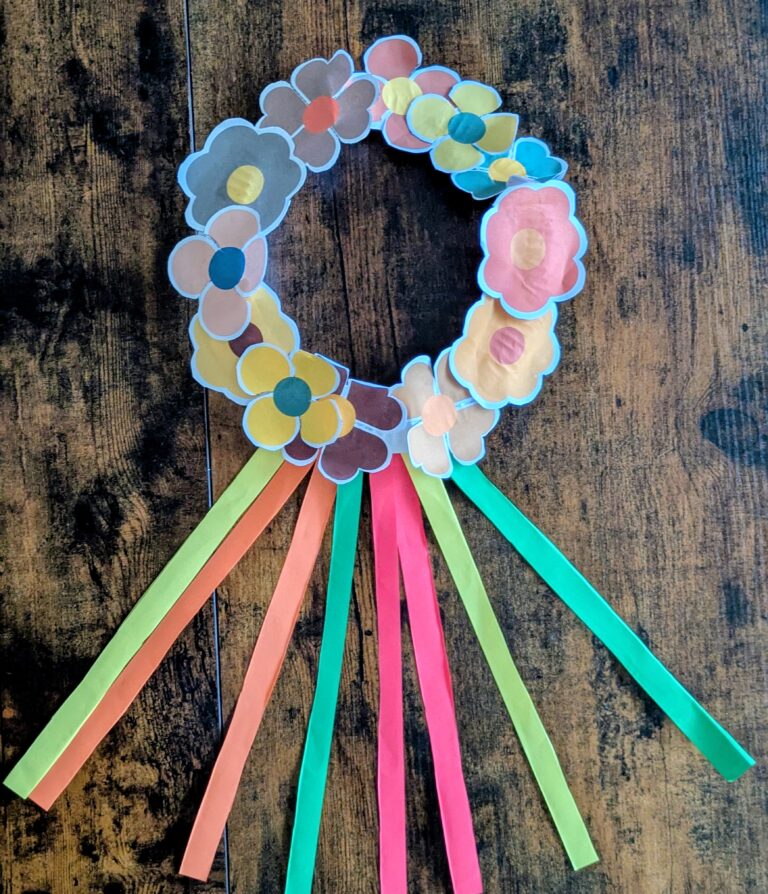
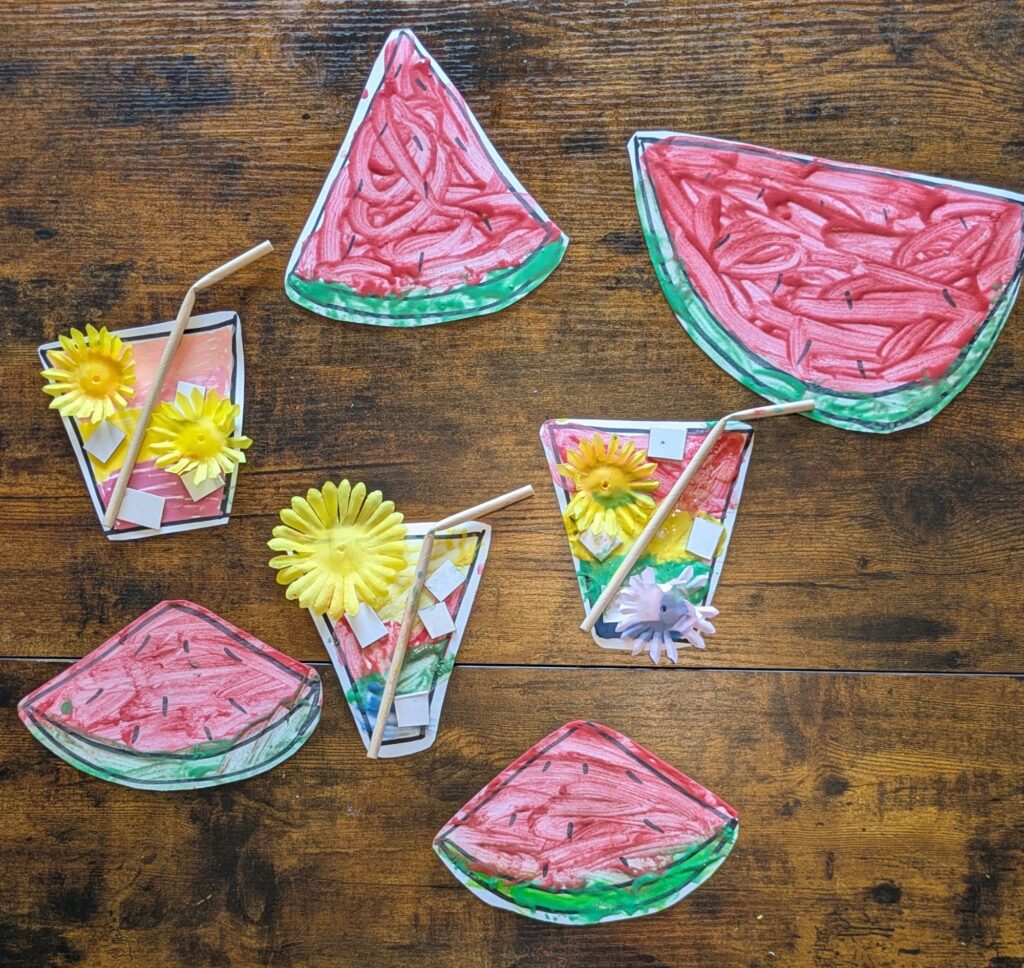
2. Fine-Motor Faux Flower Lemonade
There is nothing quite like a cold glass of lemonade on a scorching afternoon, absolutely nothing. This craft allows preschoolers to explore 3D spatial awareness by making a picture that literally pops off the page.
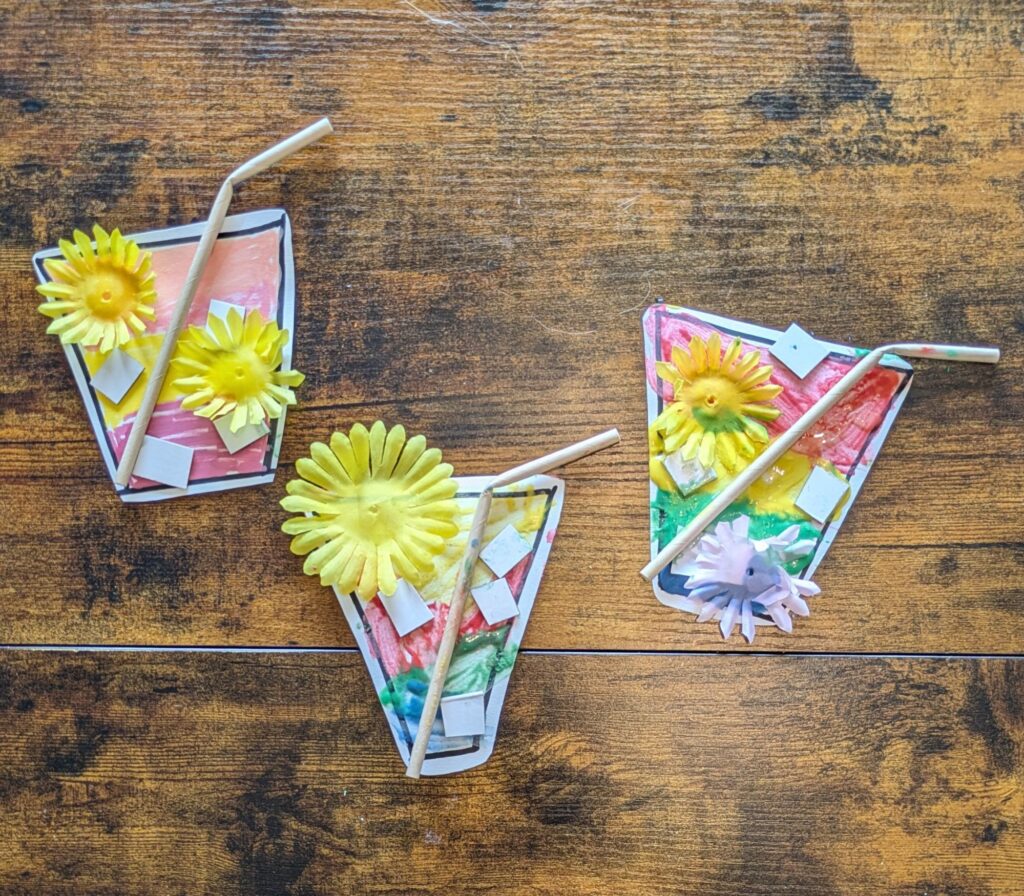
Developmental Focus: Bilateral Coordination & Spatial Awareness
This project requires kids to use both hands cooperatively (bilateral coordination), one hand to hold the paper straw down, and the other to guide the glue.
How to Make It: Draw a simple trapezoid shape to look like a drinking glass, and cut it out. Then let your child colour or paint it with whatever colour they like, using markers or a light paint wash. Cut small white cardboard squares, then take a real paper straw, bend the flexible neck, and glue it right into the glass. Finish it off by adding orange stamped slices or, in our case, a bright, tactile faux-flower, to give it that summer drink vibe, just like my kids did in the image above.
3. Heavy-Stroke Watermelon Slices
To round out our summer picnic theme, we made these chunky watermelon slices, an excellent project for kids who crave messy, tactile play.
Developmental Focus: Exploration & Wrist Control
When kids explore the thickness of the paint with the way they twist and turn their hands when painting, they’re basically building up wrist endurance. I gave my kids paint brushes to explore, and my second daughter decided to use a fork instead to drag patterns through the paint. I’m not sure what was going through her mind, but I guess that she was curious to know what a paint-dipped fork would look like.
How to Make It: Cut large cardboard into semi-circles and triangles to act as the rind, then encourage your child to paint the flesh, to do this you can use thick pink or red tempera paint, and if your kids are as curious as mine they can use a for as well to drag through the paint, it leaves behind awesome ridges and textures that look just like real fruit flesh. Now, as soon as the paint dries, have your kids use a black marker. Alternatively, you could go for black beans, or little bits of black yarn to dot the “seeds” across the pink surface – another sneaky way to encourage motor skills.
How do you dye pasta for preschool crafts?
It’s actually really easy! So, here’s what I do: I throw dry pasta into about four or five Ziploc bags (That’s because I want different colours), then I add 1 tablespoon of white vinegar and a couple drops of food colouring (to my liking. I don’t have a specific measurement – but you can try about 10 drops). Then I seal the bag and shake it up. If I have my kids close by, I let them do the shaking, which, by the way, is a fun sensory activity in itself! Next thing I do is spread the now-wet pasta onto parchment paper to dry for about an hour before using it for anything at all.
Why are mixed-media crafts better for development than standard colouring?
Sensory! Sensory! Sensory! So you see, mixed-media crafts offer sensory integration that allows a child to feel a stark contrast between smooth and rough, and when a child feels scratchy cardboard, heavy pasta, and a soft pom-pom, their brain is forming new neural connections. Apart from that, it encourages, or do I say emphasises, open-ended play – and then when all of these different textures and materials are combined, children build strong fine motor skills and boost spatial awareness.
Have you tried making mixed-media art with your little ones this summer? Which of these three treats would your preschooler want to make first? Let me know in the comments below!
Frequently Asked Questions
What glue works best for heavy mixed-media kids’ crafts?
I’ll say liquid glue. Why? Well, that’s because glue sticks don’t have the holding power for heavy materials and would just keep falling off, frustrating you and your kids. But regular liquid school glue, like Elmer’s, or quick-drying tacky glue, works best for holding pasta and faux flowers in place, and some of the liquid glue actually dries quicker than when you say, Jack Robinson. Okay, that was a bit of an exaggeration. But just let the projects air-dry flat, probably outside on the balcony or in the garden, and you’re good.