Looking for a simple summer craft for kids? This easy ice cream cone craft is a nice way to get creative on a hot day.
Materials You’ll Need:
- Brown cardboard
- Cotton wool
- Water-based paint
- Paint brushes
- Black marker
- Glue
- Small container of water
How to Make thr Ice-Cream Craft
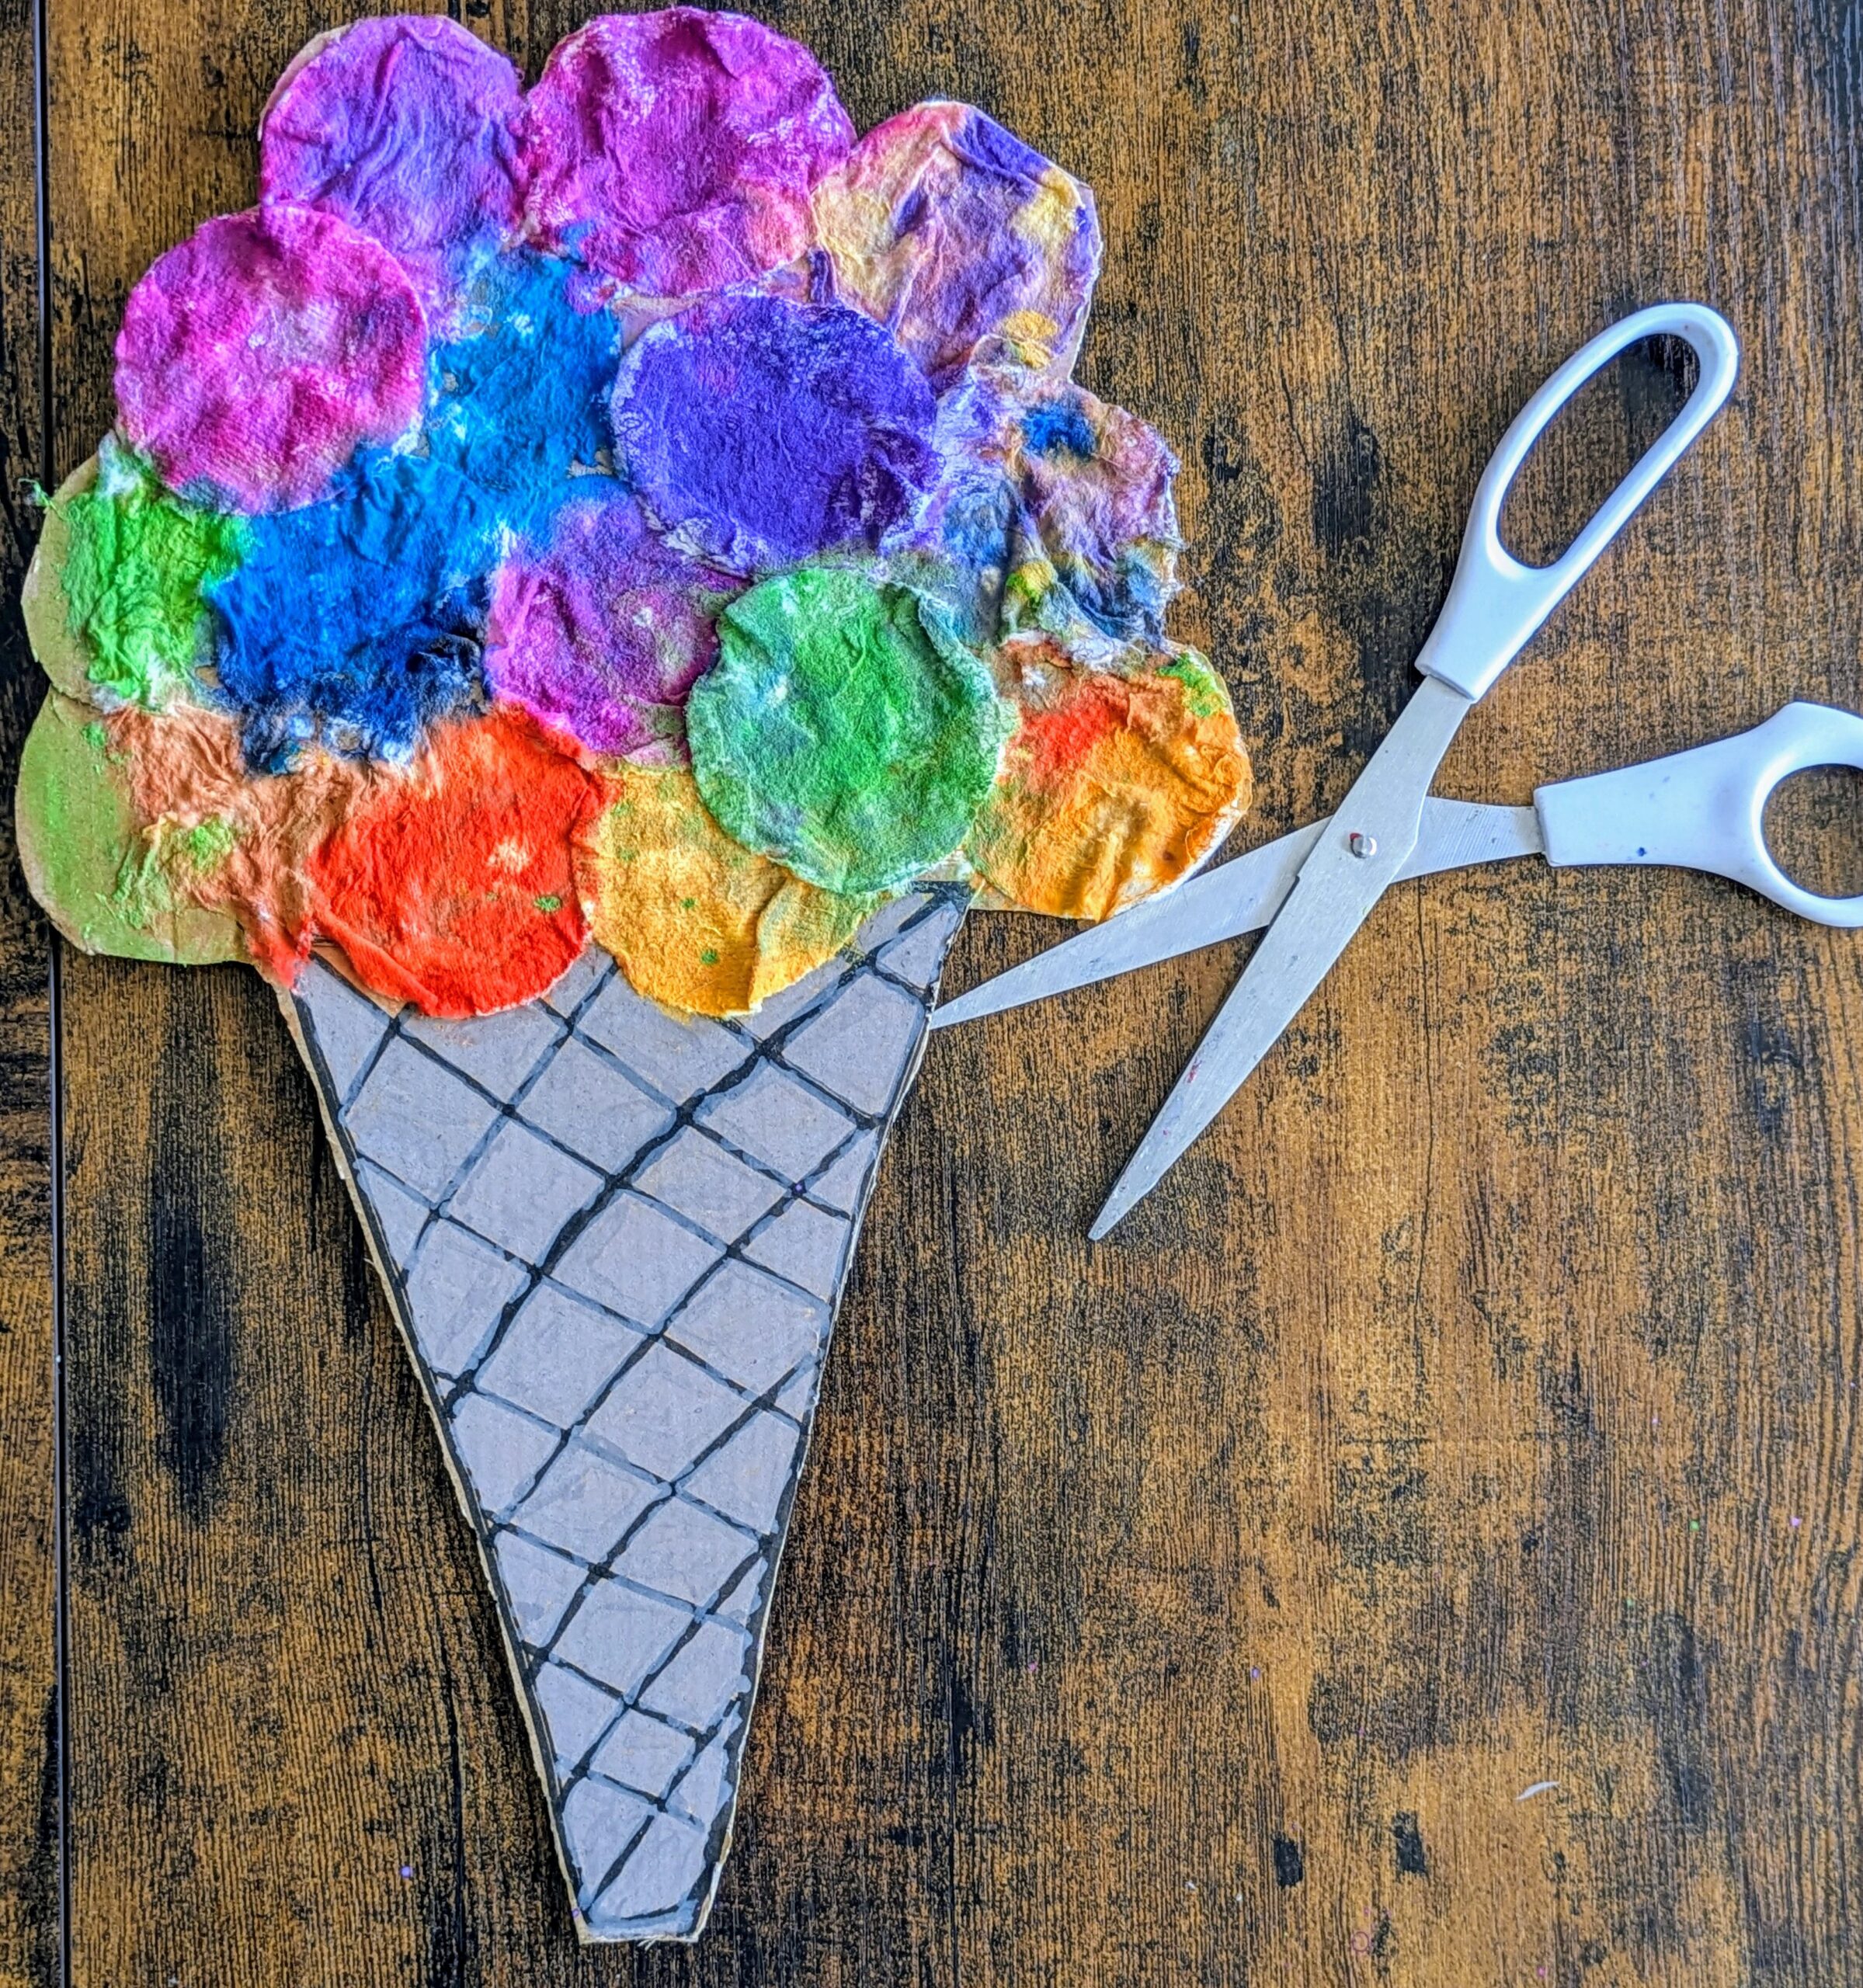
Step 1: Draw the Cone
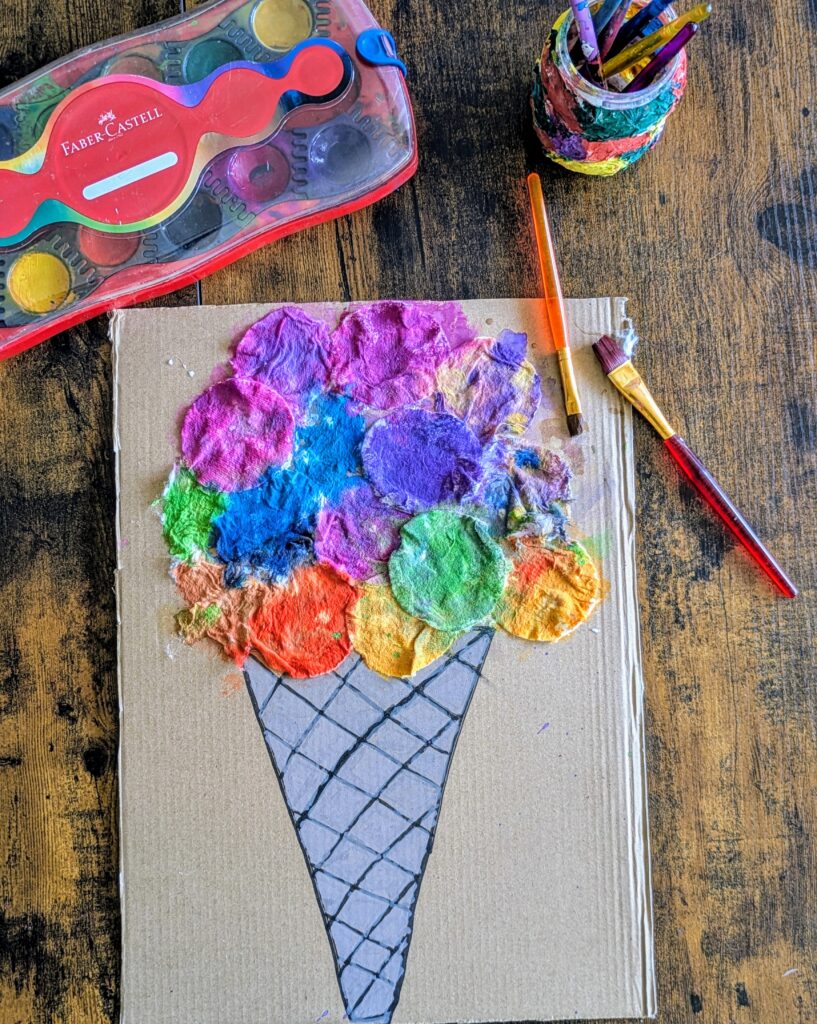
Start by drawing a large ice cream cone shape on the brown carton using a black marker. Add diagonal lines to create a waffle cone texture.
Step 2: Add the “Ice Cream”
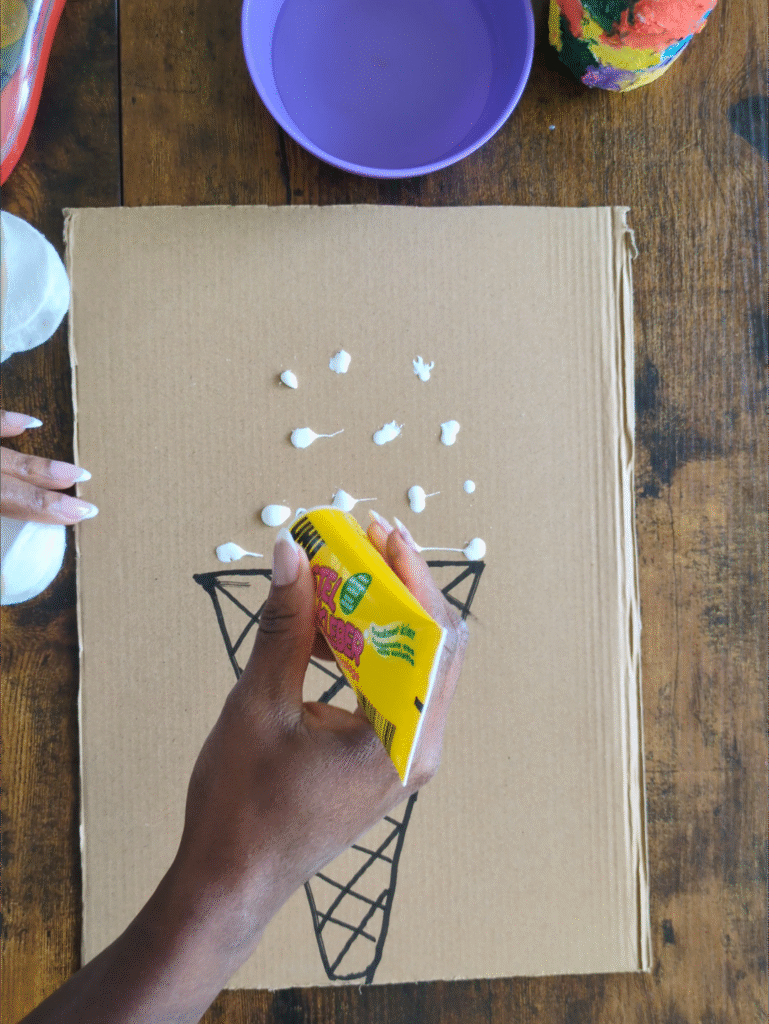
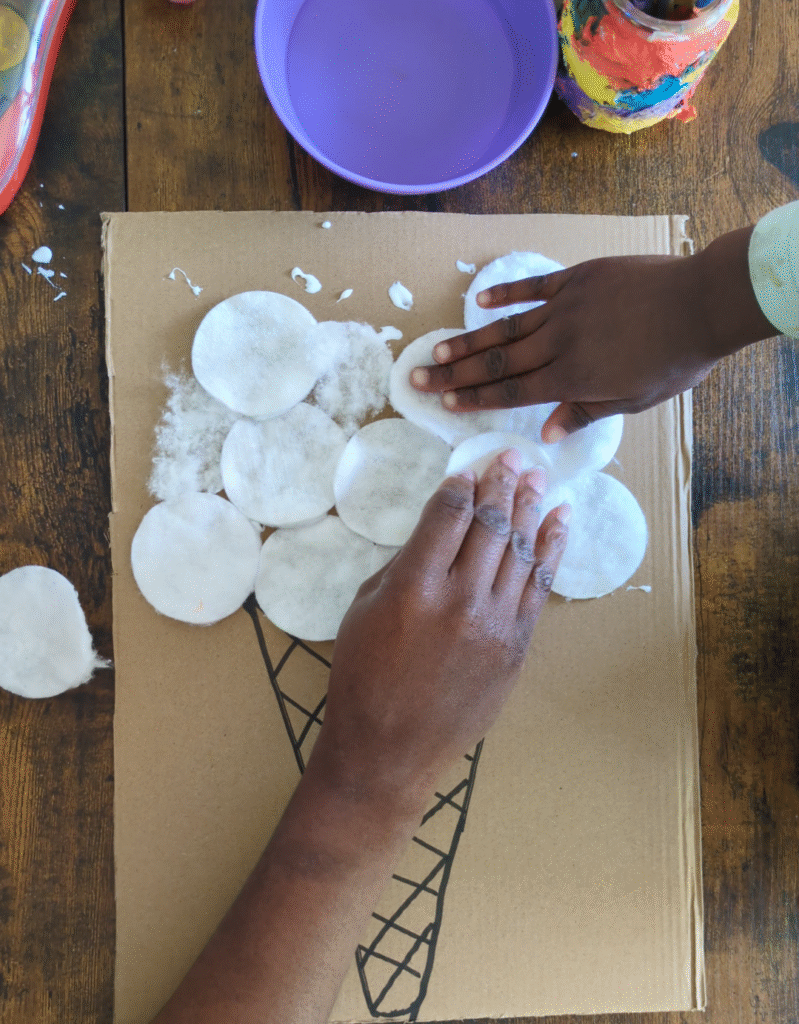
Apply glue to the top of the cone shape (the open, wide part). Gently stick pieces of cotton wool onto the glue, shaping them to look like a scoop of ice cream sitting on the cone.
Step 3: Time to Paint!
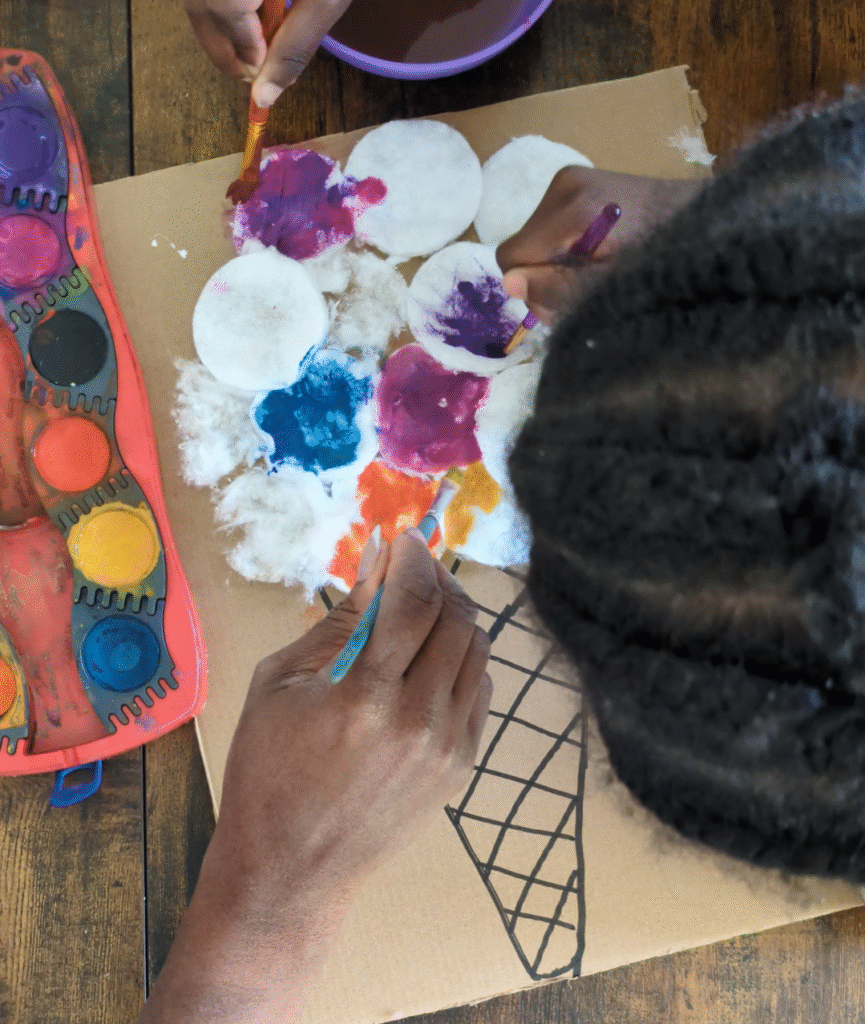
Here comes my kids’ favourite part. Dip your paintbrush in paint first, then into the water, and gently brush the cotton wool. This technique creates a soft, melty look, like real ice cream dripping on a summer day. Let kids mix colours and experiment!
Step 4: Let It Dry and Cut It Out

Once the paint is dry, cut out the entire ice cream shape from the carton. Now you have a 3D-looking, colourful summer ice cream cone craft that’s perfect for hanging on the fridge or decorating the playroom.
Share your colourful cones with us!
Tag your creations on social media, and don’t forget to subscribe for more summer craft ideas.